Friday, October 18, 2013

THE | BACHELORETTE | PARTY

My Maid of Honor / Big Sister did an amazing job with my bachelorette party.  It was exactly what I was looking for!   I wasn't into having an inappropriate, strip-club type of thing ...  I just wanted to have a fun "last night" with my girls, and that's exactly what she gave me!  


THE | BACHELORETTE | PARTY

From the food & drinks to the games & projects, she really made it so fun and memorable... here are some of the details & games that went into making my night a blast!


THE | DRINKS

She planned to have 2 pre-mixed alcoholic drinks available for the girls, as well as supplies to "mix-your-own" on the side.  It worked out amazingly well, simple and super tasty!  (My personal favorite was the Carmel-Apple punch!)


THE | GAMES

I'm not a huge fan of games that make guests feel like they are obligated to play... and my MOH did a perfect job of planning fun games that were simple, easy and fun!

     [scrap | book]

A table was set up with cardstock designed papers, stickers, glue sticks, markers and scissors for each girl to create a personalized scrapbook page.  They could each write a note or funny story for the bride to read another day, and left a space to put a photo of them & the bride from the night!  This was super cute, and the notes from my friends were so heartwarming!  A great keepsake!
(example)
     [drink | ribbons]

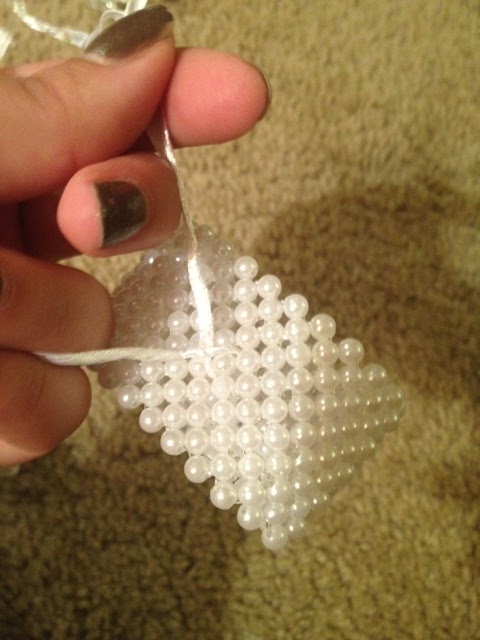
Each girl was handed a party bag when they came in which contained a photo frame where they could later place a picture from the night, a pink boa, beaded necklaces and a piece of ribbon.  They each used a sharpie to write their name on the ribbon.  They had to, at least one time in the night, have a drink or shot with the bride-to-be and then tie their ribbon on to the bride's beaded necklace.  A cute way to make sure all the guests have a special "cheers" moment with the bride!

     [toilet | paper | gown]

This was the most "game-like" event that was planned, and I thought it was SO much fun!  It worked out that there were 5 of us that were all engaged ladies - so all 5 of us stood in as the brides, and we were each teamed up with 2 "designers".  Each team was put in a different room and given 7 minutes to create a bridal gown and then (after a fashion show) I got to choose my favorite team as the winners who got a special gift to take home!


     [gift | buzzer]

Super simple.  Super fun.   Just set a timer to go off after a few minutes.  Whoever's gift the bride is opening when it goes off, wins a gift to take home!  Really cute and keeps everyone's attention while opening presents too!


THE | PHOTO | BOOTH

Having a photo booth was so much fun for before the bars!  My Maid of Honor made sure I got a picture with each girl who came, as well as group photos.  We had a backdrop set up on one wall, and set up a digital camera on a tri-pod across the way so we could set self timers to get everyone in!  Most cameras will have a self timer - our camera had a self timer that took 4 consecutive photos to give the feeling of a real photo booth.  The pictures are PRICELESS!!


THANKS AGAIN TO MY BEAUTIFUL & AMAZING MAID OF HONOR!!


Coming up next?


Thursday, October 17, 2013

WEDDING | SHOWER | DECOR [Part 2]

Here is where I started to really have fun with our decor!  I wanted to personalize everything I could to make sure our shower was fun and memorable for our guests.

WEDDING | SHOWER | DECOR  [Part 2]

I have a background in graphic design - so I decided to design the table cards, table numbers, dessert signs, and hanging banner for the head table myself.  Many of these were very simple and easy for anyone to do.  Here's what I came up with!

TABLE | CARDS

We had about 50+ guests who RSVP'd for our shower, so to make things easier we decided to do assigned tables.  I had the idea to create a template on VistaPrint where I could have them all printed out the same, and then write in each guests name and specific table.  VistaPrint has Folded Business Cards that worked perfectly for this project (250pc for $14.99).  I used the front of the card for the guest name/table number - and then used the bottom of each card to give each guest useful information about our upcoming wedding that they could store in their wallet!  Here's what they looked like:


TABLE | NUMBERS

Using the Dollar Tree once again, I found small black and gold photo frames that I thought would be cute to display the table numbers.  Then all I had to do was print out each table number to fit the frame.  (If you create the documents as a photo/JPEG, when you go to print them, it should give you a size option of 8x10, 3x5, etc)  Here's what we used:


SWEET | TABLE 

When we sent out the invitations, we encouraged any of our guests who were up for it, to bake and bring their favorite baked dessert (cookies, brownies, etc) ...which was a great excuse to use those Pinterest recipes we all save!  I printed out cards for people to write down what the dessert was and who baked it.  I also had a "Candy Bar" as part of the desserts.  We purchased different glass serving dishes from .. where else ..  the Dollar Tree and bulk candy from Sams Club.  The Dollar Tree has really cute tuxedo take-home boxes that come in packs of 10 for a dollar... and were PERFECT for the candy bar!


Here is a close up of some of the signs we made!  We just used card-stock so they were sturdy and stood on their own  (If you create a square image and only create the text/image on the bottom half, once you print it out, cut it in the square shape and then fold it in half to create a free-standing sign)


MR | MRS | HANGING | BANNER

I thought the idea of hanging a banner in front of the head table was a cute idea - and figured... why not make my own!  SO easy to do... you can even do this using microsoft word or powerpoint!  I added a chevron design to the background and in a bold font, typed out one letter from the sign.  I chose to do M R & M R S because it has a lot of the same letters and is short & sweet.  All I had to do was make 1 M, 1 R, 1 & and 1 S.  Just print the M and R pages twice (cardstock is best for durability).  Using a hole punch, punch a circle in the top 2 corners of each page.  Take ribbon or string to tie them together in the correct order.  boom.  done!


WEDDING | PARTY | SIGNS

I wanted our bridal party to feel special - since they were the ones who helped plan, decorate and were doing the brunt work when it came to opening the gifts, keeping track of which guest brought them, and packing them up to be taken home...

So I made them all signs to put up at their tables so everyone would know who they were!   ...these also came in handy for cute group photos!


Our shower was amazing and I still can't thank everyone enough for their help, for attending and for all their generous gifts!  :)


Hmmm... what next.  Oh, right...

THE | BACHELORETTE | PARTY

WEDDING | SHOWER | DECOR [Part 1]

We absolutely lucked out for our shower.  My parent's "besties" own a banquet hall nearby who were able to offer us an amazing opportunity to have our wedding shower at their venue.  They were really great with helping with the details of the tablecloth colors, chair colors, bow colors, etc...  and the food was incredible!  If you are in the area and looking for a great banquet hall, please do yourself a favor and look into Alta Villa Banquets in Addison, IL.
(www.altavillabanquets.com)

WEDDING | SHOWER | DECOR  [Part 1]

I still wanted to be able to tie in our wedding Gatsby theme to the shower, so I decided to make/arrange our own centerpieces and other various decorations to give the shower more personality. 

The Dollar Tree has been one of the most useful, money saving places throughout our entire year of wedding planning.  You might have to use your imagination, but they have some great items for ... a dollar.  We used a lot of Dollar Tree items to spruce up the shower.  For example:

THE | CENTERPIECES

I found packs of tissue paper that had plain ivory, plain gold and a gold/ivory design at the Dollar Tree... and basically bought them out!  I used these to make tissue poms to cover the center of each table, as well as for the gift table, sweet table, etc.   Each pack make 4 poms... which is an unbelievable deal when you compare it to the pre-made poms you can buy in the stores.  (i.e. getting 8 Martha Stewart Poms for $12.99 which comes out to $1.62 per pom!)  HERE'S HOW:

Materials:
Tissue Paper Pack
Scissors
Ribbon/String


Step 1 - Leave tissue paper folded in half & cut across to make 2 parts.
Step 2 - Open and cut your 2 remaining parts in half again to be left with 4 square parts.

Step 3 - If you are working with multiple colors or designs, mix up the arrangement to create different final looks.

Step 4 - Starting at one end, fold all the sheets together accordion style in about 1 inch sections all the way to the other end.

Step 5 - Tie a ribbon, string or any other item you wish to use around the center, securely, but keeping the flat shape - don't tie it too tight and bunch the material in the middle, this will make it harder to open.  BEFORE fanning the item out, cut the ends to your desired shape.  I wanted a pointed edge, but you can also do a rounded edge for a different look.

Step 6 - Fan open the top and bottom parts.  Starting on one side, carefully pull the top sheet of the top section towards the bottom, and vice versa.  I found it is easiest to do 1 or two sheets on one side, and then flip to the other side so you end with the sheets in the middle.   Then... just fluff it out to create the circular shape!


Here's what I ended up with for my centerpieces.  When you put them all together, they look really stunning!


To finish off the look at the shower, I purchased tea light candle holders, tea lights  glass pillar candle holders and short pillar candles from the Dollar Tree as well.  Here's a sketch of the final look:


I wasn't done there though... I wanted to add more of our theme and personalities to the decor...


Wednesday, September 4, 2013

THE | CORSAGES

I wanted to make the corsages for the grandparents & godparents so they would all fit the theme... and could be a nice keepsake for all of them.  I was able to find all the pieces to make these at Hobby Lobby & Michaels.

From Hobby Lobby:
 - Corsage "real touch" flowers
 - Bouquet Accents (pearl/rhinestone pieces)

From Michaels:
 - Pearl Corsage Bracelet


THE | CORSAGES  - HOW TO!


What you need:

 - "His&Hers" Corsage flower - or small single stem flower of your choice
 - Thin 1/2" or less ribbon
 - Rhinestone/Pearl - or accent piece of your choice
 - Corsage bracelet
 - Hot Glue Gun
 - Scissors


1.  I removed the flower bud & leaves from the corsage flowers because I wanted it to be very simple & classic.  The ribbon was already attached to the corsage flower - but if you are using a different flower - tie the ribbon in a bow around the stem & secure with hot glue.

2.  The stem was too long for my liking - so I bent the stem/wire and tucked it back.  You can either secure now with the hot glue gun, or wait until next step.

3.  Using 1 of the bouquet accent pieces - I bent the wire in half and then twisted it to create a shorter, stronger stem.

4.  Place the pearl accent over the center of the ribbon bow.  Wrap the wire around the stem tightly (which should also help to secure the flower stem that was bent back).  Make sure the end is tucked away and use hot glue to secure.

5.  The corsage bracelets from Michaels came with a ribbon already attached.  If not - tie the ribbon to the center of the bracelet.

6.  Place the stem of the flower in the middle and tie the bracelet ribbon in a knot directly underneath the head of the flower and above the decorative ribbon.  Secure with another knot in the same spot.  Then wrap the ribbon to the back side and tie in one more knot.

7.  Using hot glue, secure the knot in the back, underneath the flower.  Then cut off the extra ribbon pieces.


FINISHED LOOK:


THE | BOUQUETS

With the headpieces out of the way - the next on my TO-DO list was the bouquets.  We weren't planning on using any real flowers for our wedding - so all our decorations & bouquets are made with silk flowers.  I made single flowers for the bridesmaids, a small bouquet for the maid of honor, 2 rose bouquets for the moms, a toss bouquet, and my keep bouquet.

Here's how I did them!


TOSS | BOUQUET

I used short, single stem flowers from Hobby Lobby for $1.99 each.  For this bouquet, I chose the ivory hydrangeas.  Here's how:

- 2 single stem hydrangeas
- gold ribbon
- rhinestones
- duct tape
- hot glue gun
- scissors
- needle & matching gold thread


1.  Using hot glue, I attached a rhinestone to the center of MOST of the flowers.


 2.  Put the stems together and arrange the bouquet how you would like it to look.  Using the duct tape, wrap it once around the stems to hold them in place.

3.  Starting near the bottom, apply hot glue and slowly start wrapping the ribbon upwards to cover the duct tape.  Glue again at the top to secure, then continue to wrap back down to the starting point.

4.  Tuck the end and then stitch with your needed and thread to secure.


5.  Tie the ribbon to the stem of the flower - over the area that was duct tapped.  Continue to tie into a bow shape - use hot glue gun in the center to secure.

FINISHED LOOK:


MAID OF HONOR | BOUQUET


I also used the short, single stem flowers for this bouquet.  They had ones that were champagne with gold sparkle accents on the petals which were perfect for her.  Here's what I used to make them:

 - 5 single stem flowers
 - gold sparkly button for center accents
 - gold ribbon
 - duct tape  (matching stems)
 - hot glue gun
 - scissors
 - needle & matching gold thread


1. Using hot glue, I applied one gold button to the center of each flower as additional flair.

2.  Arrange the flowers into a bouquet and using duct tape (I used dark green to match the stems) tape stems together to hold shape.

3.  Take the gold ribbon and starting near the bottom of the stems, apply a small amount of hot glue to hold the beginning in place, and then continue wrapping the ribbon around the stems.  Use more of an angle to use less ribbon.  Make sure to go all the way up to cover the duct tape.  Apply a little hot glue at the top to hold in place - then continue to wrap coming back down the stems until you reach the starting point.

4.  Tuck the end of the ribbon and using your needle & thread stitch in place to hold.

FINISHED LOOK:


BRIDESMAIDS | FLOWERS


I wanted the flowers for the bridesmaids to be something small and simple.  In the same section of hobby lobby, I found short stemmed black & white printed flowers that from a slight distance actually resembled feathers.  PERFECT!!  Here's how I made these:

 - 1 Flower for each girl
 - Silver sparkle ribbon
    (this was on clearance in the Christmas aisle at hobby lobby)
 - Rhinestones
 - Scissors
 - Hot Glue Gun

1.  Using hot glue gun, apply rhinestones in any pattern to the center of the flower as an accent.

2.  Tie the silver ribbon to the stem of the flower.  Secure to the stem with hot glue so it doesn't slide down.

3.  Arrange ribbon in a bow shape - use hot glue gun in the center to secure.

FINISHED LOOK:


MOM | BOUQUETS

I wanted to have a small bouquet for each of the moms to carry - instead of the same corsages we were giving to our grandparents & godparents.  I actually got lucky and found a pre-made silk bouquet of roses at Michaels in the clearance bin and decided to use these.  What I added was the pearl/rhinestone accents & ribbons.  The rhinestone/pearl accents were from Hobby Lobby - down the wedding aisle - in the bins for bouquet accents.

Here's how I made these:

1.  I folded the wire of the accent pieces in half and then twisted them.  Then, starting by the top I coiled the wiring until it was completely hidden below the top piece.

2.  Using hot glue, I applied a generous amount to the silk flower where I wanted the accent piece.  Press and hold the accent piece until the glue has cooled.

3.  Repeat until you are happy with the amount of accent pieces.

4.  Using the ribbon, start wrapping near the bottom.  Apply hot glue to hold in place, then continue to wrap the ribbon up the stems.  Apply hot glue at the top to secure, then continue to wrap back down the stems to the starting point.

5.  Tuck the end and using a needle and thread, stitch the bottom in place.

6.  Using a 21" piece of ribbon, tie to the stem, near the bouquet - and apply hot glue to secure.  Finish with a bow and secure with hot glue in the center to hold.

7.  OPTIONAL:  Add a rhinestone button to the center of the bow using needle & thread.

FINISHED LOOK:


The next project on the TO-DO List....