Wednesday, September 4, 2013

THE | CORSAGES

I wanted to make the corsages for the grandparents & godparents so they would all fit the theme... and could be a nice keepsake for all of them.  I was able to find all the pieces to make these at Hobby Lobby & Michaels.

From Hobby Lobby:
 - Corsage "real touch" flowers
 - Bouquet Accents (pearl/rhinestone pieces)

From Michaels:
 - Pearl Corsage Bracelet


THE | CORSAGES  - HOW TO!


What you need:

 - "His&Hers" Corsage flower - or small single stem flower of your choice
 - Thin 1/2" or less ribbon
 - Rhinestone/Pearl - or accent piece of your choice
 - Corsage bracelet
 - Hot Glue Gun
 - Scissors


1.  I removed the flower bud & leaves from the corsage flowers because I wanted it to be very simple & classic.  The ribbon was already attached to the corsage flower - but if you are using a different flower - tie the ribbon in a bow around the stem & secure with hot glue.

2.  The stem was too long for my liking - so I bent the stem/wire and tucked it back.  You can either secure now with the hot glue gun, or wait until next step.

3.  Using 1 of the bouquet accent pieces - I bent the wire in half and then twisted it to create a shorter, stronger stem.

4.  Place the pearl accent over the center of the ribbon bow.  Wrap the wire around the stem tightly (which should also help to secure the flower stem that was bent back).  Make sure the end is tucked away and use hot glue to secure.

5.  The corsage bracelets from Michaels came with a ribbon already attached.  If not - tie the ribbon to the center of the bracelet.

6.  Place the stem of the flower in the middle and tie the bracelet ribbon in a knot directly underneath the head of the flower and above the decorative ribbon.  Secure with another knot in the same spot.  Then wrap the ribbon to the back side and tie in one more knot.

7.  Using hot glue, secure the knot in the back, underneath the flower.  Then cut off the extra ribbon pieces.


FINISHED LOOK:


THE | BOUQUETS

With the headpieces out of the way - the next on my TO-DO list was the bouquets.  We weren't planning on using any real flowers for our wedding - so all our decorations & bouquets are made with silk flowers.  I made single flowers for the bridesmaids, a small bouquet for the maid of honor, 2 rose bouquets for the moms, a toss bouquet, and my keep bouquet.

Here's how I did them!


TOSS | BOUQUET

I used short, single stem flowers from Hobby Lobby for $1.99 each.  For this bouquet, I chose the ivory hydrangeas.  Here's how:

- 2 single stem hydrangeas
- gold ribbon
- rhinestones
- duct tape
- hot glue gun
- scissors
- needle & matching gold thread


1.  Using hot glue, I attached a rhinestone to the center of MOST of the flowers.


 2.  Put the stems together and arrange the bouquet how you would like it to look.  Using the duct tape, wrap it once around the stems to hold them in place.

3.  Starting near the bottom, apply hot glue and slowly start wrapping the ribbon upwards to cover the duct tape.  Glue again at the top to secure, then continue to wrap back down to the starting point.

4.  Tuck the end and then stitch with your needed and thread to secure.


5.  Tie the ribbon to the stem of the flower - over the area that was duct tapped.  Continue to tie into a bow shape - use hot glue gun in the center to secure.

FINISHED LOOK:


MAID OF HONOR | BOUQUET


I also used the short, single stem flowers for this bouquet.  They had ones that were champagne with gold sparkle accents on the petals which were perfect for her.  Here's what I used to make them:

 - 5 single stem flowers
 - gold sparkly button for center accents
 - gold ribbon
 - duct tape  (matching stems)
 - hot glue gun
 - scissors
 - needle & matching gold thread


1. Using hot glue, I applied one gold button to the center of each flower as additional flair.

2.  Arrange the flowers into a bouquet and using duct tape (I used dark green to match the stems) tape stems together to hold shape.

3.  Take the gold ribbon and starting near the bottom of the stems, apply a small amount of hot glue to hold the beginning in place, and then continue wrapping the ribbon around the stems.  Use more of an angle to use less ribbon.  Make sure to go all the way up to cover the duct tape.  Apply a little hot glue at the top to hold in place - then continue to wrap coming back down the stems until you reach the starting point.

4.  Tuck the end of the ribbon and using your needle & thread stitch in place to hold.

FINISHED LOOK:


BRIDESMAIDS | FLOWERS


I wanted the flowers for the bridesmaids to be something small and simple.  In the same section of hobby lobby, I found short stemmed black & white printed flowers that from a slight distance actually resembled feathers.  PERFECT!!  Here's how I made these:

 - 1 Flower for each girl
 - Silver sparkle ribbon
    (this was on clearance in the Christmas aisle at hobby lobby)
 - Rhinestones
 - Scissors
 - Hot Glue Gun

1.  Using hot glue gun, apply rhinestones in any pattern to the center of the flower as an accent.

2.  Tie the silver ribbon to the stem of the flower.  Secure to the stem with hot glue so it doesn't slide down.

3.  Arrange ribbon in a bow shape - use hot glue gun in the center to secure.

FINISHED LOOK:


MOM | BOUQUETS

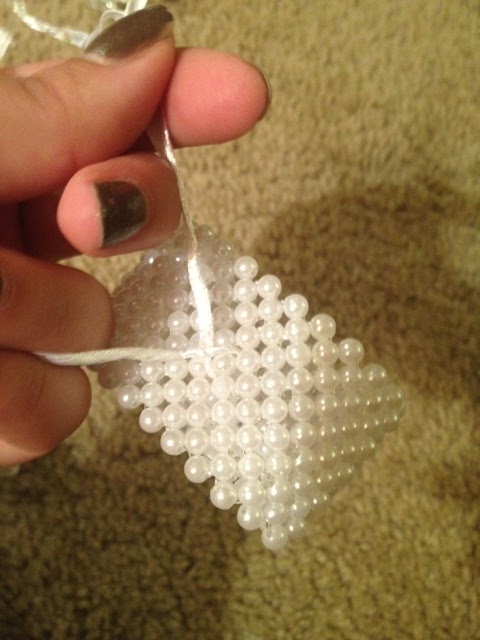
I wanted to have a small bouquet for each of the moms to carry - instead of the same corsages we were giving to our grandparents & godparents.  I actually got lucky and found a pre-made silk bouquet of roses at Michaels in the clearance bin and decided to use these.  What I added was the pearl/rhinestone accents & ribbons.  The rhinestone/pearl accents were from Hobby Lobby - down the wedding aisle - in the bins for bouquet accents.

Here's how I made these:

1.  I folded the wire of the accent pieces in half and then twisted them.  Then, starting by the top I coiled the wiring until it was completely hidden below the top piece.

2.  Using hot glue, I applied a generous amount to the silk flower where I wanted the accent piece.  Press and hold the accent piece until the glue has cooled.

3.  Repeat until you are happy with the amount of accent pieces.

4.  Using the ribbon, start wrapping near the bottom.  Apply hot glue to hold in place, then continue to wrap the ribbon up the stems.  Apply hot glue at the top to secure, then continue to wrap back down the stems to the starting point.

5.  Tuck the end and using a needle and thread, stitch the bottom in place.

6.  Using a 21" piece of ribbon, tie to the stem, near the bouquet - and apply hot glue to secure.  Finish with a bow and secure with hot glue in the center to hold.

7.  OPTIONAL:  Add a rhinestone button to the center of the bow using needle & thread.

FINISHED LOOK:


The next project on the TO-DO List....

THE | GATSBY | HEADPIECES

I wanted to keep our wedding party as small as possible... but we ended up with 7 girls & 7 guys standing up.

The only thing this changed for me was my plan for their accessories.  I had originally planned to use Etsy to find them some vintage headpieces to wear and some fabric bouquet arrangements.  The problem is with the material cost, the labor and the shipping... for 7 girls, it ended up being more than I had planned in my budget.

Luckily... I LOVE doing DIY projects and decided I was going to make all of the accessories myself!


THE | HEADPIECES   (TUTORIAL BELOW)


I went back and forth between buying a lace headpiece to work off of, and just buying the lace material and making them myself.  Luckily, I found lace headbands from Hobby Lobby that were the right size, colors - and super reasonable in price.

I got one in a shimmery ivory/champagne color for my maid of honor, and 6 in a black sequin lace material for my bridesmaids.
Available at Hobby Lobby

In the same aisle at Hobby Lobby, they should have beaded, sequin or rhinestone appliques to choose from.  I chose a circular rhinestone applique for my maid of honor, and a beaded applique for the bridesmaids.
Available at Hobby Lobby

I also went down the scrapbooking aisle to grab some more pearl/rhinestone decor.  I find it is really easy to use the scrapbook decor for projects like this because they will have flat backings & usually have their own adhesive so you can place them and make sure you like how it looks before finally securing it.
Available at Hobby Lobby & Michaels


They do have feather pads at Hobby Lobby - but they didn't have a color selection that I needed, so I went to Etsy.com to order the feather pads.
I ordered them from FEATHERSHOPPE and was very satisfied with the quality and how quickly they shipped.
Etsy Store:  FEATHERSHOPPE


Once I had all the parts - it was time to make some headpieces!


HOW TO | TUTORIAL


What you need:
 - Hot Glue Gun / Glue
 - Foam Ball or Foam Head Form
 - Headband
 - Feather pads
 - Rhinestone Applique
 - Rhinestones (separates)


1.  Place headband on foam ball or head form.  Apply hot glue to the headband where you would like the feathers to be placed.  (For me, I wanted them all on the right since that is the side my bridemaids would be showing when they were standing up).  Press and hold the feather pad to the headband.  If there are any loose edges, apply more hot glue to the band and press the feather pad until secure.


2. Using hot glue gun, apply applique over the area where the feather pad & headband meet to hide edges.  It was easiest for me to apply the glue down the center of the applique - press it to the band, and then go back and secure loose edges.


3.  OPTIONAL:  Using hot glue gun, apply rhinestone pieces or other decorative accents for further "flair" to the applique.  It is easiest to apply the glue to the applique and press the rhinestone or accent piece into the glue.

4.  OPTIONAL:  Using hot glue gun, apply glue to rhinestone piece - allow to cool slightly before pressing to feather pad.

(I used a slightly different applique for half of the bridesmaids hairpieces for some variety)


5.  When you are finished, slide the back of the headband up - the front area will most likely be glued slightly to the foam.  Start at the ends and work the headpiece away from the foam until it is fully detached.

FINAL LOOK:


For the maid of honor's head piece - I did the same process with different pieces.  I used a champagne lace headband, an ivory feather pad, circular rhinestone applique, and pre-formed pearl/rhinestone scrapbooking accessories to accent the feather & around the applique.


***ADDITION TO ORIGINAL POST!!!
  Since writing this post, I have also been asked to create headbands/headpieces for the moms, grandmas, my godmother and a few other wedding guests as well as extras for my guests to use in our photo booth!  Here is what I have created:


To Make the Comb Headpieces, Just glue the end of the comb
to the center of the feather pad backing
From that point, adding the applique & rhinestone decorations
is the same as the headband instructions above


Up next....

THE | BOUQUETS